In this post I’ll show you how to install Ubuntu Server 24.04 LTS (Jammy Jellyfish) on Oracle’s VirtualBox. I’ll also demonstrate how to connect to the Ubuntu instance via SSH, as well as how to run VirtualBox in headless mode.
Let’s get started!
Note: this post was updated on 17th May, 2025 to use the latest versions of Ubuntu Server and VirtualBox.
What Is VirtualBox?
VirtualBox is a software virtualization package that you can install on your operating system (just as you would a normal program). It supports the creation and management of virtual machines into which you can install a second operating system.
In VirtualBox terminology, the operating system on which you install VirtualBox (i.e. your regular OS) is called the host. The operating system you install within VirtualBox (i.e. inside the virtual machine) is called the guest.
For this tutorial, I’ll be using Linux Mint 22.1 as the host OS, but there’s no reason you couldn’t use a different Linux distro, or macOS, or Windows (if you’re so inclined).
Install VirtualBox
The first thing to do is to get VirtualBox installed. The process varies slightly depending on your host system, but Oracle provides platform-specific installers that are straightforward to use. If you encounter issues or have special requirements, consult the User Guide, especially these sections:
On most Linux distributions, you can install VirtualBox directly via your package manager or software center. For example, on Linux Mint, simply searching for “VirtualBox” will pull in the appropriate package from the official repositories. This is what I did, and it installed version 7.0.16 — slightly behind the latest version (7.1.8) available from the VirtualBox website.
Download Ubuntu Server
The next thing to do is to grab a copy of Ubuntu Server. You can do this from their download page. Hit the green download button and this will download a 3.2GB ISO file to your PC.
At the time of writing the current LTS version is Ubuntu Server 24.04 and this is what I’ll be using. It’s supported until April 2029.
Create a New Virtual Machine
Start up VirtualBox. This should open the VirtualBox Manager, the interface from which you will administer all of your virtual machines.

Click on New (in the top right of the VirtualBox Manager) to proceed.

Give your virtual machine a name — the two dropdown menus should update automatically based on your input.
Next, select the ISO image. To do this, click the ISO Image dropdown (which initially shows <not selected>), then choose Other…. A file picker will open. Navigate to the file you downloaded earlier — it should be called ubuntu-24.04.2-live-server-amd64.iso. Select it and confirm (e.g. click Open).
Also, tick the box labeled Skip Unattended Installation. This gives you full visibility into the Ubuntu setup process and allows for more fine-grained control over how the system is installed.
Once done, click Next.

The wizard will now prompt you to choose how much memory (RAM), in megabytes, to allocate to the virtual machine. I went with 2GB (2048MB).
You’ll also be asked to select the number of processor cores to assign — I chose 2.
Having made your selection, click Next.

On the next screen you’ll be prompted to add a virtual hard disk to the new machine. Make sure Create a Virtual Hard Disk Now is selected.
On this same screen, you can also set the size of the virtual hard disk — I left it at the default 25GB. If you leave the Pre-allocate Full Size box unchecked, the disk will grow dynamically as needed rather than occupying the full 25GB immediately.
Once you’ve configured everything, click Next to continue.

Finally, you’ll see a summary of the configuration you have chosen. Assuming everything is correct, click Finish.
The hard disk should now be created and you should find yourself back in the VirtualBox Manager. You should see your newly created virtual machine listed on the left.
Install Ubuntu Server in the Virtual Machine
In this section, we’ll walk through installing Ubuntu Server as a guest operating system inside VirtualBox, running on your host machine.
Before we get started, a quick note for those of you using a 4K monitor: the VirtualBox window will likely appear incredibly small, making it nearly impossible to read anything. To fix this, open VirtualBox, go to File > Preferences > Display, and set the Scale Factor to 200% (or whatever looks best on your screen). This setting will make the VirtualBox interface much more usable.
Now, with your virtual machine selected, press Start. Once the machine boots, you’ll see a screen offering the option to Try or Install Ubuntu Server. The first option — Install Ubuntu Server — will already be selected. Click anywhere inside the VM window to focus it.
Note the first time you click inside the VM, VirtualBox will display a message explaining that you’ve clicked into the virtual machine and that it is capturing your keyboard and mouse input. This is normal. Simply tick the box that says Do not show this message again, then click Capture.

You will also notice a semi-transparent sidebar on the right side of the VM window. This sidebar cannot be permanently disabled (source). However, you can manage it in two ways:
- Click the speech bubble icon with an exclamation mark at the top of the sidebar to temporarily hide it.
- For each message, click the speech bubble with a line through it to permanently suppress that specific message.

Once you’re done dismissing or ignoring those messages, press Return (or wait a few seconds) to move into the Ubuntu welcome screen. From there, the installation process will begin.
Navigating the Install Screen
Once the Ubuntu installer loads, you’ll interact with it entirely via the keyboard.
Use Tab to move forward through the available options, and Shift+Tab to move backwards. Press Space to select or deselect checkboxes, and Return to confirm a choice or activate a highlighted button.
These keys are all you’ll need to navigate and complete the installation process in the terminal-based interface. You’ll first use them on the welcome screen to select your language and begin the setup.
The Welcome Screen
Here you should select your preferred language. I’m using English.

Keyboard Configuration
Here you should select a keyboard layout. As I’m using a German keyboard, I asked Ubuntu to detect my layout, which it did with a couple of simple questions.

Type of Install
Next you should choose between the default install that contains a curated set of packages and a minimized version, which has been customized to have a small runtime footprint. Choose the default option.

The Search for third-party drivers option scans your system for hardware that may benefit from proprietary drivers (e.g. graphics, Wi-Fi, or input devices) and installs them if available. I left it unchecked.
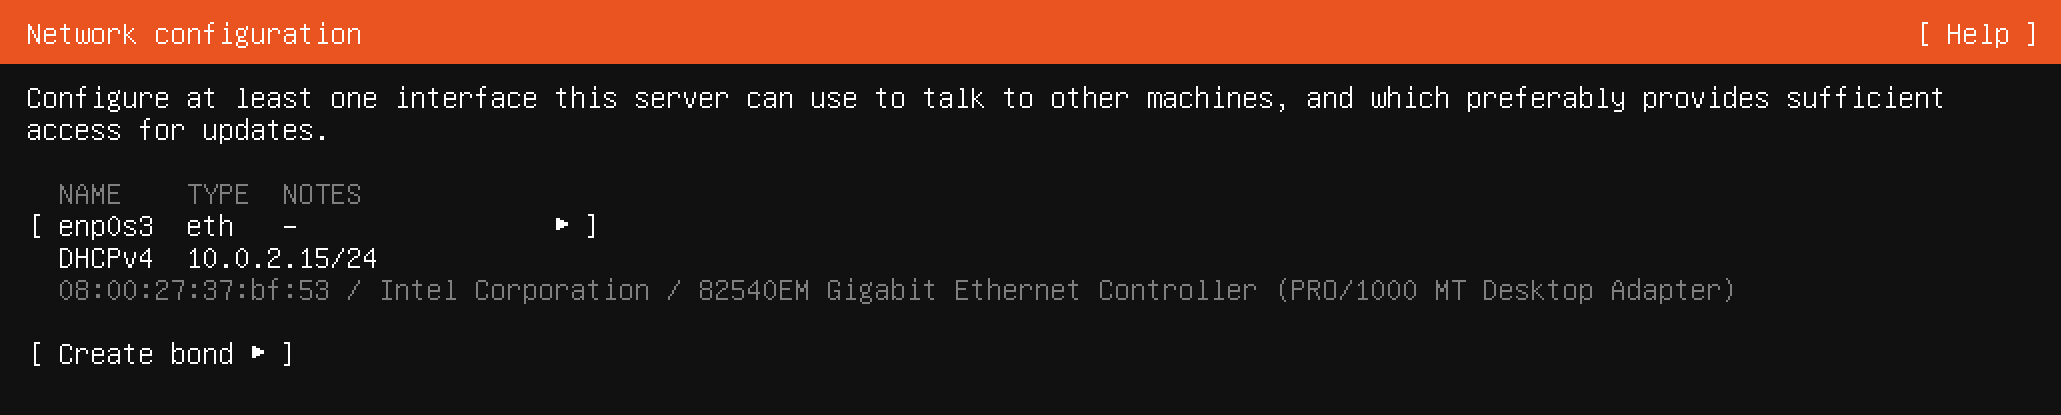
Network Connections
Here Ubuntu will attempt to configure the standard network interface. Normally you can just accept the default and select Done.
Configure Proxy
If your system requires a proxy to connect to the internet (mine doesn’t), enter its details in the next dialogue. Then select Done.

Configure Ubuntu Archive Mirror
If you wish to use an alternative mirror for Ubuntu, you can enter the details here. Otherwise accept the default mirror by selecting Done. I accepted the default.

Guided Storage Configuration
The installer can guide you through partitioning an entire disk or, if you prefer, you can do it manually. If you choose to partition an entire disk you will still have a chance to review and modify the results before Ubuntu is installed. I selected Use an entire disk.
You can optionally instruct the installer to set up the disk as an LVM group, as well as to encrypt it using LUKS. I chose to go with the LVM setup, as LVM offers a number of benifits, such as allowing easier backups of a running server. You can read more about LVM here: What is LVM and what is it used for?

Storage Configuration Summary
The next screen summarizes the choices you made in the previous step. If you are happy with everything, select Done.

As this is a “destructive action”. I was asked to confirm my choice with Continue.

Profile Setup
Here you are required to enter:
- Your (real) name
- Your server’s name
- Your username
- Password
Fill these details out as you see fit.

Upgrade to Ubuntu Pro
At this point, you’re given the option to enable Ubuntu Pro, a free subscription for personal use that extends security updates to a broader set of packages and adds support for various compliance standards.

I chose to skip this step. You can always enable Ubuntu Pro later using the pro attach command.
SSH Setup
Here we have a chance to install the OpenSSH server package. We’ll need this to connect to the virtual machine via SSH later on, so ensure that you select it.
You also have the opportunity to import your SSH keys from GitHub or Launchpad. I selected No for this option.

Featured Server Snaps
Here you can select from a list of popular snaps to install on your system. Snaps are self-contained software packages that work across a range of Linux distributions. I didn’t select any.

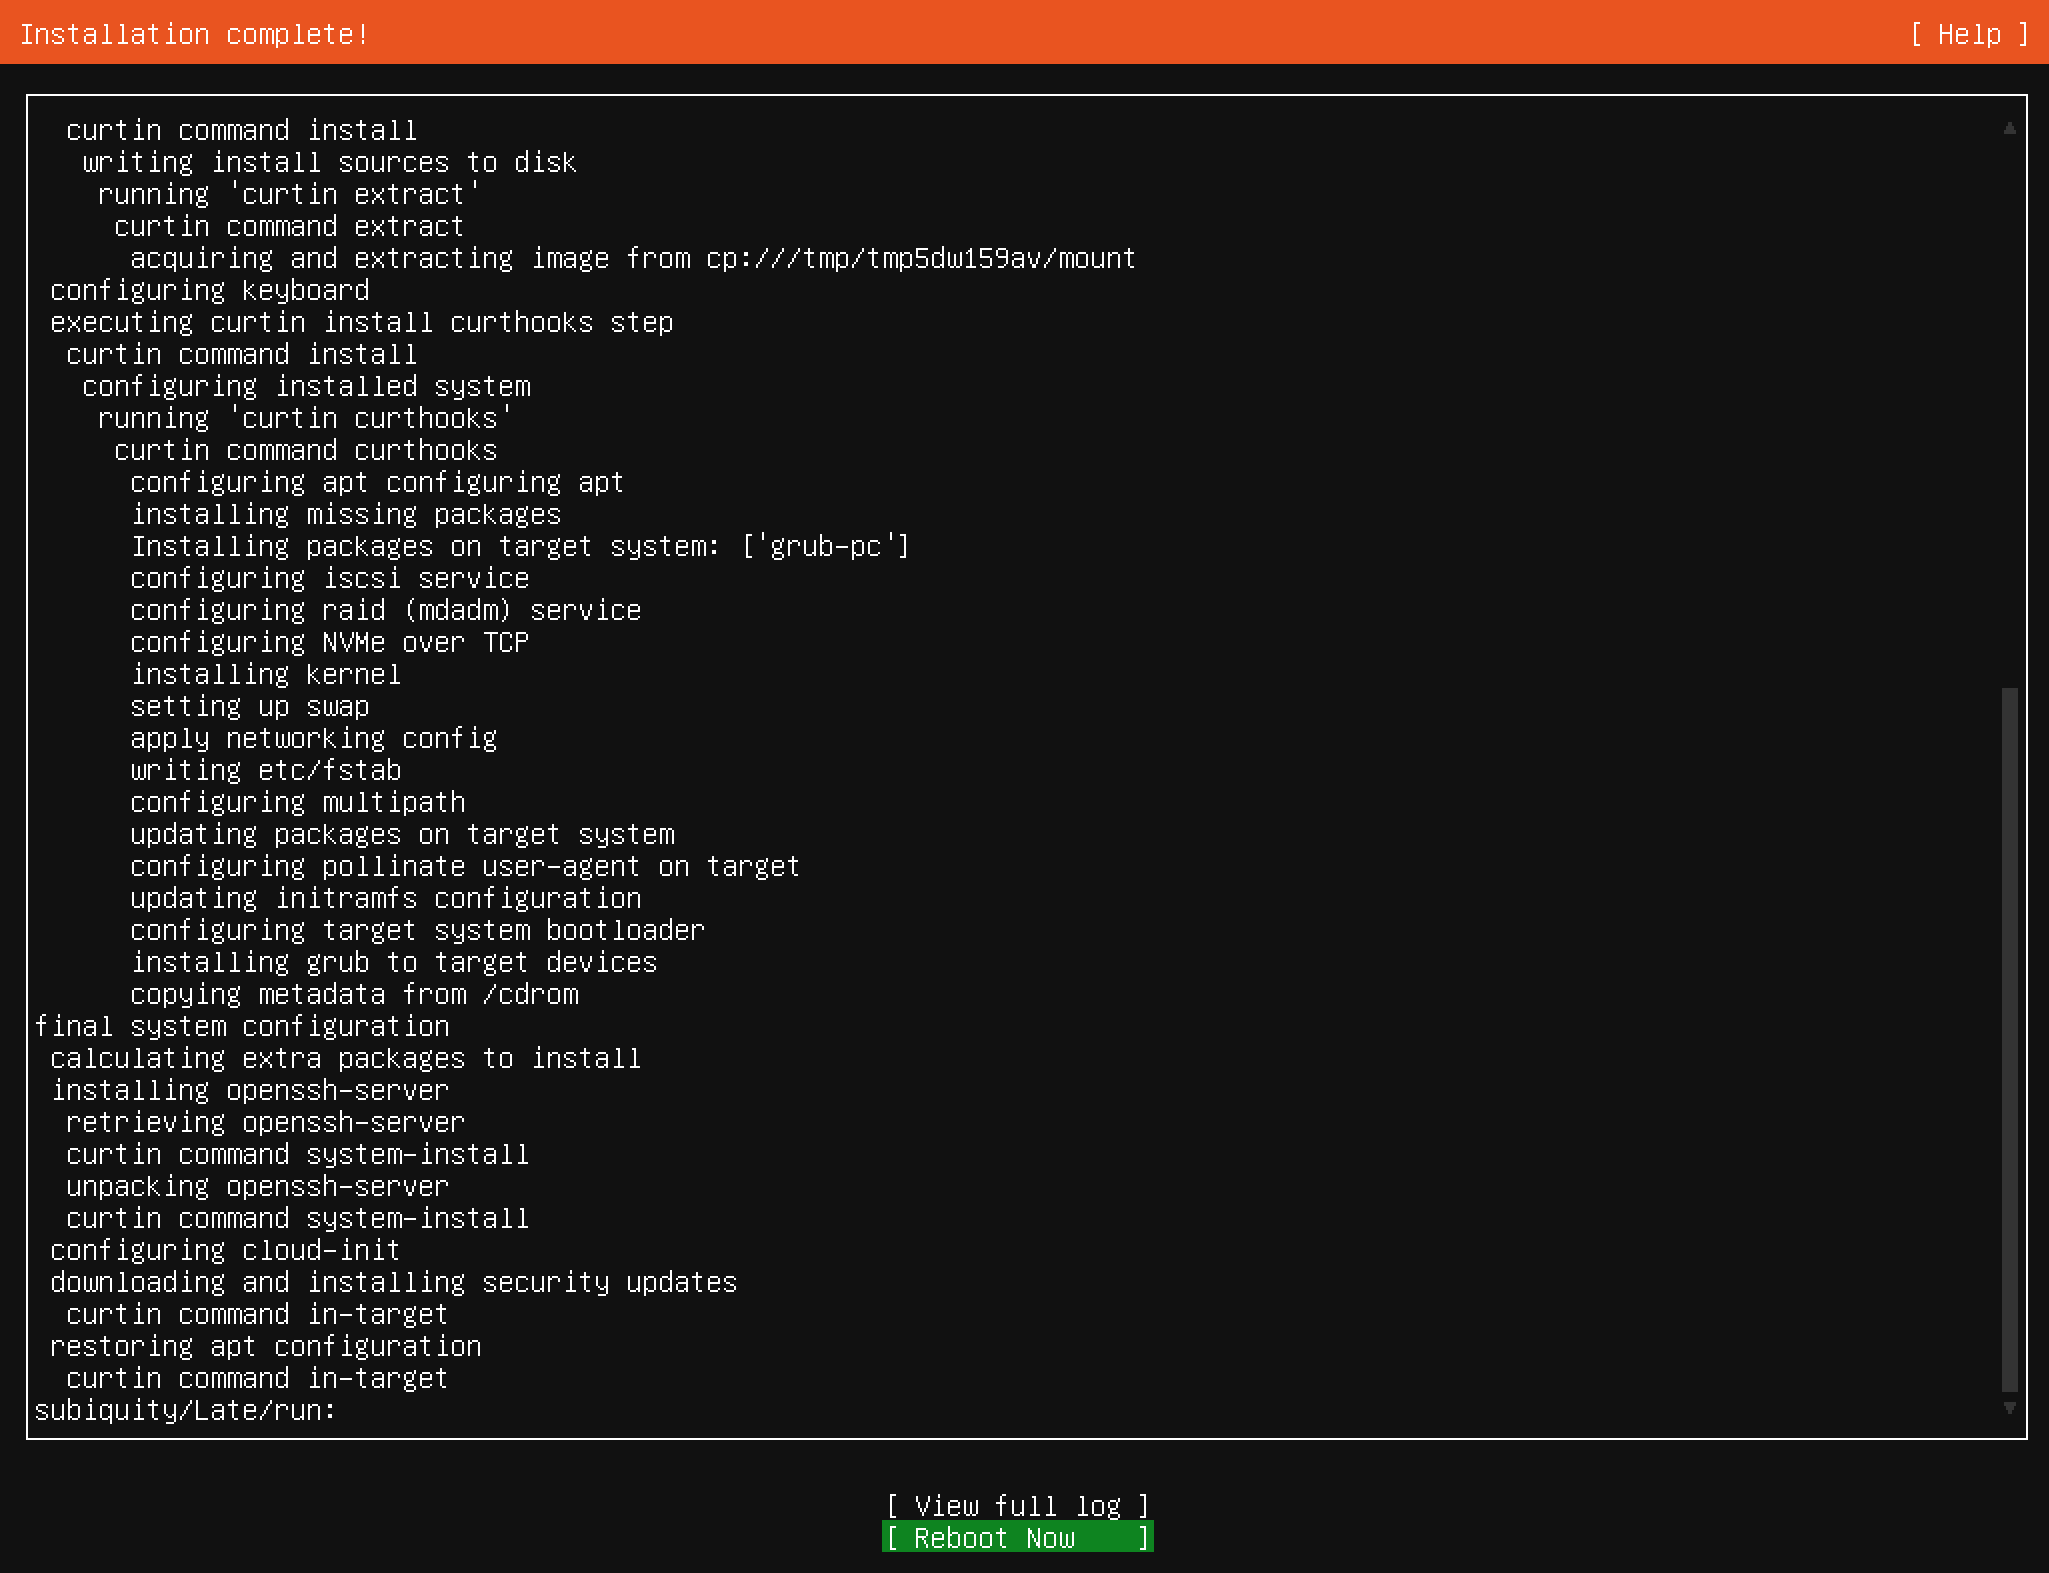
Install and reboot
And that’s it, the installaler will now install Ubuntu 24.04. Once it is finished you should select Reboot Now
Ubuntu will ask you to remove the installation medium and press Enter. You can remove the disk via Devices > Optical Drives > Remove disk from virtual drive. You will need to put a check mark next to ubuntu-22.04-live-server-amd64.iso if it is not selected already.
If for some reason this option is grayed out (it was for me), just hit Return
Up and Running with SSH
Once your virtual machine has rebooted and you have logged in, you’ll probably notice that some packages can be updated.
Let’s fix that:
sudo apt update
sudo apt upgrade
Now let’s double check that SSH is installed (it should be if you selected the option Install OpenSSH server during instalation).
jim@grunt:~$ ssh
usage: ssh [-46AaCfGgKkMNnqsTtVvXxYy] [-B bind_interface] [-b bind_address]
           [-c cipher_spec] [-D [bind_address:]port] [-E log_file]
           [-e escape_char] [-F configfile] [-I pkcs11] [-i identity_file]
           [-J destination] [-L address] [-l login_name] [-m mac_spec]
           [-O ctl_cmd] [-o option] [-P tag] [-p port] [-R address]
           [-S ctl_path] [-W host:port] [-w local_tun[:remote_tun]]
           destination [command [argument ...]]
       ssh [-Q query_option]
If you get a “command not found” error, you can install it with:
sudo apt-get install openssh-server
The next step is to give our Ubuntu server an IP address on our local network. To do this, power off the virtual machine using sudo poweroff or Machine > ACPI Shutdown.
Then, in VirtualBox Manager, make sure your machine is selected and click Settings. Click on Network on the left and change the setting Adapter 1 > NAT to Bridged Adapter and click OK.

Start up your virtual machine, then enter ip address (in the guest) and note the IP address assigned to your main network adapter. In my case this was 192.168.178.49.
Note: it is also possible to stick with the original NAT interface and SSH into the guest using port forwarding. You can read more about that here. You can find information on all of the VBox network settings in this comprehensive guide.
Starting and Stopping VirtualBox in Headless Mode
You might have noticed, working with the VirtualBox Manager and the guest OS is a bit of a pain. If you’re going to continue doing this, you should at least install the guest additions, as well as enable clipboard support.
There is a slightly nicer way however — you can start and stop the virtual machine using the VBoxManage command from your terminal.
To power on:
VBoxManage startvm "Ubuntu Server 24.04" --type headless
And to power off:
VBoxManage controlvm "Ubuntu Server 24.04" poweroff
Where “Ubuntu Server 24.04” is whatever you called your virtual machine (the name it has in the VirtualBox Manager GUI).
Connecting to the Ubuntu Server
First, make sure the virtual machine is shut down. If it’s still running, open the terminal inside Ubuntu and run sudo poweroff.
Once it’s powered down, we’ll start it again in headless mode:
VBoxManage startvm "Ubuntu Server 24.04" --type headless
And then connect to it via SSH.
Note: The following commands should be run on your host.
On most *nix systems, the SSH client software should be part of the default installation. If you don’t have it available, you should be able to grab it from the repos, like so:
sudo apt install openssh-client
or just hit DuckDuckGo.
Then (ensuring that you replace “jim” and the IP address with your corresponding values) you can connect like so:
ssh jim@192.168.178.49
This will give you a warning that the host’s authenticity cannot be established and ask you if you want to continue connecting. Answer “yes”.
Next, it will prompt you for your password. Enter it and you will be connected to your Ubuntu server from your host OS.

For Windows Users
If you’re running Windows you’ll need to install a SSH client such as PuTTY.
When PuTTY starts, a window titled PuTTY Configuration should open. This window has a configuration pane on the left, a Host Name field and other options in the middle, and a pane for saving session profiles in the lower right area.
For simple use, all you need to do is to enter the IP address of the host you want to connect to in the Host Name field and click Open.

Generate and Install a SSH Key Pair
SSH keys offer a secure manner of logging into a server without the need of a password.
In a nutshell, this depends upon you generating a public and a private SSH key pair. The private key is kept on your PC (and should be guarded carefully). The public key is copied over to the server you wish to connect to.
SSH keys are a complex subject and as such, out of the scope of this tutorial. If you’d like to find out more, I recommend looking for a dedicated tutorial (such as this one).
Generate the Keys
On *nix systems (Windows users see the next section), you can generate your key pair with the following command:
ssh-keygen -o -b 4096 -t rsa
The -o option instructs ssh-keygen to store the private key in the new OpenSSH format instead of the old (and more compatible PEM format). This is advisable, as the new OpenSSH format has an increased resistance to brute-force password cracking.
The -b option is used to set the key length to 4096 bits instead of the default 1024 bits for security reasons.
In the following dialogue you will be required to answer a couple of questions:
- Where to save the newly generated key pair
- Which passphrase to use
Here you can accept the default location and leave the passphrase blank by pressing Return.
ssh-keygen will then output a summary of what it has done:
Generating public/private rsa key pair.
Enter file in which to save the key (/home/jim/.ssh/id_rsa):
Created directory '/home/jim/.ssh'.
Enter passphrase (empty for no passphrase):
Enter same passphrase again:
Your identification has been saved in /home/jim/.ssh/id_rsa.
Your public key has been saved in /home/jim/.ssh/id_rsa.pub.
The key fingerprint is:
SHA256:sx5uJeVdH/cT/1+GxsSWYzmjf5hUaE33f/e57EbqBfY jim@fitz
The key's randomart image is:
+---[RSA 4096]----+
|                 |
|                o|
|               +o|
|          .  .+==|
|        So . =@oB|
|        .oo o*+BB|
|        oo  ..*EX|
|       o..   +=+=|
|       .o   ..+=+|
+----[SHA256]-----+
Copy the Public Key to the Ubuntu Server
To copy the public key to the Ubuntu server use:
ssh-copy-id -i ~/.ssh/id_rsa.pub jim@192.168.178.49
Where ~/.ssh/id_rsa.pub is the path to your public key, taken from the output above. And where jim@192.168.178.49 should be altered to reflect your details.
The command will run and you should be asked for your server password. Enter it, then attempt to log into the server like so:
ssh jim@192.168.178.49
This time you should be in without a password.
For Windows Users
You should be able to use a tool like PuTTYgen to achieve the same thing. Here is a tutorial on using PuTTYgen to create a new key pair for authentication.
You will have a little more leg work when it comes to copying the key to the server, where you will need to add the public key to a ~/.ssh/authorized_keys file.
You can do that like so (on the guest):
cd
mkdir .ssh
cd .ssh
nano authorized_keys
This will create the appropriate file, then open the nano editor into which you can copy your newly generated public key.
When you’re done, press Ctrl + X to save your changes and exit nano.
Conclusion
This has been quite a long post, but by the end of it you should have a working installation of Ubuntu Server running on VirtualBox that you can connect to from your host operating system via SSH.
If you have any questions or feedback, I’d be glad to hear your from you in the comments.
Comments