It often occurs that I make changes to an existing website for a client, then send the client a mail informing them of what I have done.
However, it is not an infrequent occurrence that I then receive a mail back from the (sometimes disgruntled) client, saying that they cannot see any changes.
Hmmm… I know I made the changes and I’m viewing them on the live site, so why can’t the client see the same thing?
The answer is because of browser caching.
Browser Caching 101
Each time you access a file through your web browser (if you don’t know what a web browser is, read this), the browser caches (i.e. stores) it in a temporary internet files folder on your hard drive.
The reason that it does this, is so that the next time you open the same page, it doesn’t have to retrieve the file from a remote web server (the computer that hosts the web site), only from the local hard drive.
This results in a big increase in speed for you, the end user.
Browsers cache all kinds of files, ranging from HTML to CSS to images and this is normally a good thing. However, in some situations (such as the one described above), it can lead to problems.
So, How Do I View Changes to a Web Page When My Browser Has It Cached?
Well, the simple answer is to reload the web page in question.
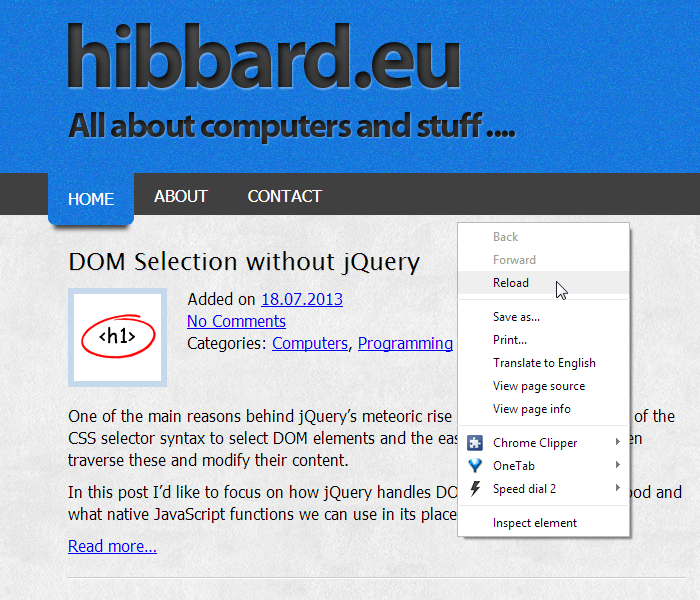
You can normally do this by pressing the F5 button on your keyboard, or by right clicking on the page and selecting reload from the context menu, as is shown in the screen shot (click image to enlarge).

If this doesn’t work for you, try holding down the Control key (bottom left hand corner of your keyboard) and pressing F5. This will force a cache refresh.
For those of you that want a little more technical information on the subject, check out this discussion on StackOverflow which goes into detail about what happens behind the scenes.
Clearing Your Cache Completely
A slightly more draconian (but nonetheless equally as effective) solution is to clear your browser’s cache completely.
Be warned: doing this may also result in your browsing history, download history, saved form data and cookies being erased (depending on the options you select).
You also need to know which browser you are running, as the instructions vary slightly from browser to browser.
If you don’t know which browser you are using, visit http://whatbrowser.org/
Chrome
- In the browser bar, enter:
chrome://settings/clearBrowserData - Select the items you want to clear by checking the appropriate boxes
- Select the period of time for which you want to clear cached information from the drop-down menu
- Click Clear browsing data
Firefox
- From the Tools or History menu, select Clear Recent History
- From the Time range to clear drop-down menu, select the desired range
- Click the down arrow next to Details to choose which elements of the history to clear.
- Click Clear Now
Internet Explorer
- Select Tools > Safety > Delete browsing history…
- Deselect Preserve Favorites website data, then select any of Temporary Internet files, Cookies, and History
- Click Delete
Opera
- From the Opera menu, select Settings, and then Delete Private Data…
- In the dialog box that opens, select the items you want to clear
- Click Delete.
And What If My Browser Isn’t Listed Above?
If you don’t see instructions above for your specific browser, then search your browser’s Help menu for “clear cache”.
Failing that, ask Google. A typical query could be:
How to clear cache in <browser name> <version number>
It is also worth noting that you can do all of this and a lot more with the mighty CCleaner.